Mood Changes
From WiCWiki
|
- by Gozeus
A mood change effects the environment settings depending on how much destruction has occurred during game time. In an 8 vs 8 game the mood change is usually noticeable at about the 10 minute mark. If someone gets an early nuke in, you might even see the change before this. A good example of a mood change on one of Massive's maps is do_riverbed. The clouds get thicker, the fog increases and it starts to snow. This tutorial will show you how to create a mood change for a map in WiCEd.
Note: This tutorial used some of the info in this post by Mir.
Programs you need:
- World in conflict map editor (WiCEd)
- Some sort of text editor (Notepad will do)
Other Useful Tutorials:
An introduction to the WiCEd environment editor: Environment Editor (Introduction)
Quote from the environment editor tutorial:
A lot of the postFX and environment can be changed during a match of WiC. This is called mood change an it’s dependent on how much damage the players cause the environment. The more you bomb and burn mother earth, the faster will the mood will change.
Getting Stuff Ready
Open your map in WiCEd and go to the environment editor. Under the PostFX tab, set the "Mood Change Preset" to <custom>. If you want to, play around with the environment settings to see what kind of effects you can create. Everything you can edit in the environment editor can be effected by the mood change. See if you can create a nice sunny day with a few clouds. That way, when we do our mood change to a dark rainy day, it will be all the more effective :D
Once your done, make sure the "Mood Change Present" is still set to <custom>, save your map and close WiCEd.
Creating the Mode Change
To create the mood change, the easiest way is to take the default mood change, edit, compile and save.
Text Editing Time
Go to your world in conflict editor directory. Should be something like:
C:\Program Files\Sierra Entertainment\World In Conflict Editor
Go to the "effects\mood" folder and copy "destruction.juice" to "maps\MYMAPNAME\moods".
Open "maps\MYMAPNAME\MYMAPNAME.juice" in a text editor (This file can be rather huge).
Seach for "myMoodSetupFiles" and change it to:
	myMoodSetupFiles
	{
		FILE mood0 effects/mood/iminagoodmood.ice
		FILE mood1 maps/MAPNAME/destruction.ice
	}
Save and close.
Open "maps\MYMAPNAME\moods\destruction.juice" and have a look at all the variables you can change (The default mood change does not have all possible variables as we'll be adding one shortly). The basic format of this file is:
INCLUDE juice/moodsetup.fruit

MoodSetup myMoodSetup
{
	myMoodVariables
	{
		<Cloud lighting, shading, scaling, transparency>

		<Fog color, start point, end point>

		<Sky color>

		<Sun color, size>

		<WarFilter levels, saturation, noise, strength, color, scale>

		<Bloom setup>

	}
}
All of these variables control how the environment will change relative to the original environment. For this tutorial we will be changing the Fog color, Fog start/end point, Lighting, WarFilter levels, Windspeed and adding a camera effect to make it rain.
Go to the the fog color variable:
MoodVariable MoodVariable(myFog.myColor)
See the three decimal values called myDecimal0, myDecimal1, myDecimal2? Change these to:
	MoodVariable MoodVariable(myFog.myColor)
	{
		myName myFog.myColor
		myType MOOD_DATATYPE_RGB
		myEnableFlag 1
		myUseEnvParamsFlag 0
		myDecimal0 58
		myDecimal1 58
		myDecimal2 52
		myFile0 <empty>
		myText0 <empty>
	}
This will change the fog color to: Dark Grey
Now change the following values to create a dark rainy day effect (If only one decimal value is provided, change "myDecimal0").
myFog.myFogEnd            -> 1600           (Fog end point)
myFog.myFogStart          -> 5              (Fog start point)
mySun.myAmbientColor      -> 37,52,61       (Ambient light RGB)
mySun.myColor             -> 186,167,122    (Directional light RGB)
myWarFilter.myLevels      -> 0.76,0.71,0.77 (Post effects color adjustment RGB)
myWarFilter.myLevels.High -> 230            (Saturation high level)
myWarFilter.myLevels.Low  -> 10             (Saturation low level)
myWarFilter.myNoise       -> 5              (Noise level)
myCloud.myWindSpeedScale  -> 5              (Multiplies current windspeed by 5)
To add some rain, paste the following into the file (you can change "rain_medium.mrb" to what ever mrb you want to use for the precipitation effect)
     MoodVariable MoodVariable(myCameraEffectObject.mySetup)
     {
            myName myCameraEffectObject.mySetup
            myType MOOD_DATATYPE_FILE_AND_TEXT
            myEnableFlag 1
            myUseEnvParamsFlag 0
            myDecimal0 0
            myDecimal1 0
            myDecimal2 0
            myFile0 landscapes/weather/rain/rain_medium.mrb
            myText0 <empty>
      }
Save the file and close.
Seeing the Mood Change in Action
Nearly done now. The only thing remaining is to open the map in WiCEd and compile. So long as you've pointed to the correct "destruction.ice" file in the myMoodSetupFiles section of the MYMAPNAME.juice file, the compiler will automatically compile "destruction.juice" to a ".ice" file (you can use juicemaker but it is unnecessary). Once its compiled, setup a game with bots or friends and blow stuff up until you see the environment start to darken and rain :)
Here's what should happen:
Good mood:
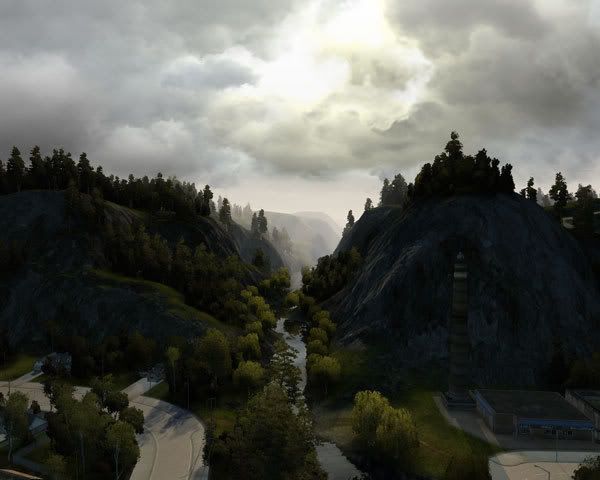
Destruction mood

Final Bits
It can be quite hard to visualize what effects your "text editing" has on the final map. I found it useful to play with the environment editor in WiCEd until I found the right mood, then copy over those settings into the appropriate place in "destruction.juice". I'm sure there are lots of things I've missed out and glossed over as I don't know everything about the mood change effect, so as usual, feel free to add and change things in this tutorial.
Mood changes add a really cool "feel" to a map, so if you've got the time, add a mood change to your map. It doesn't have to be a dark and gloomy change either :)
- Gozeus
